
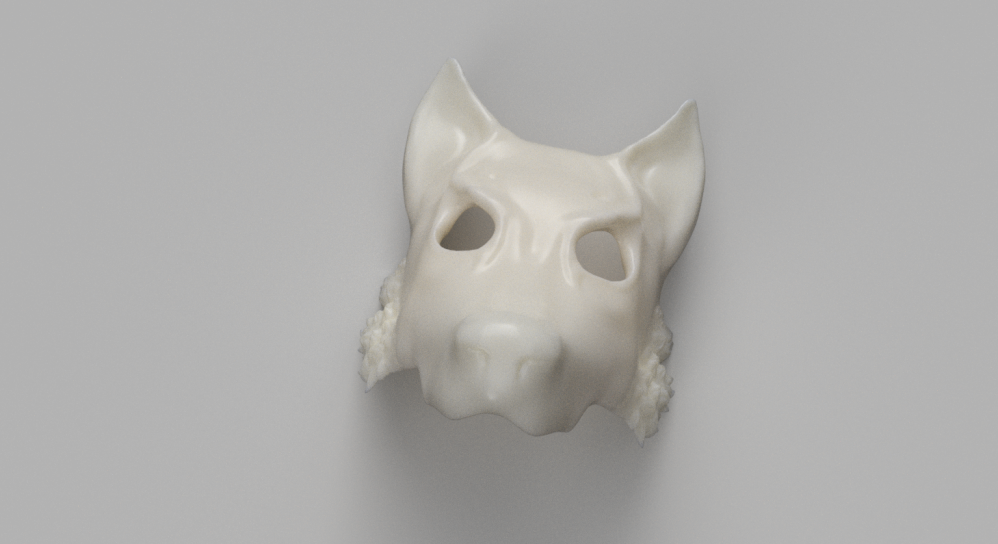
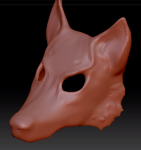
Based on the sketches I created these masks in Zbrush. I started with a sphere and found that it was quite difficult to get the shape of the mask correct.


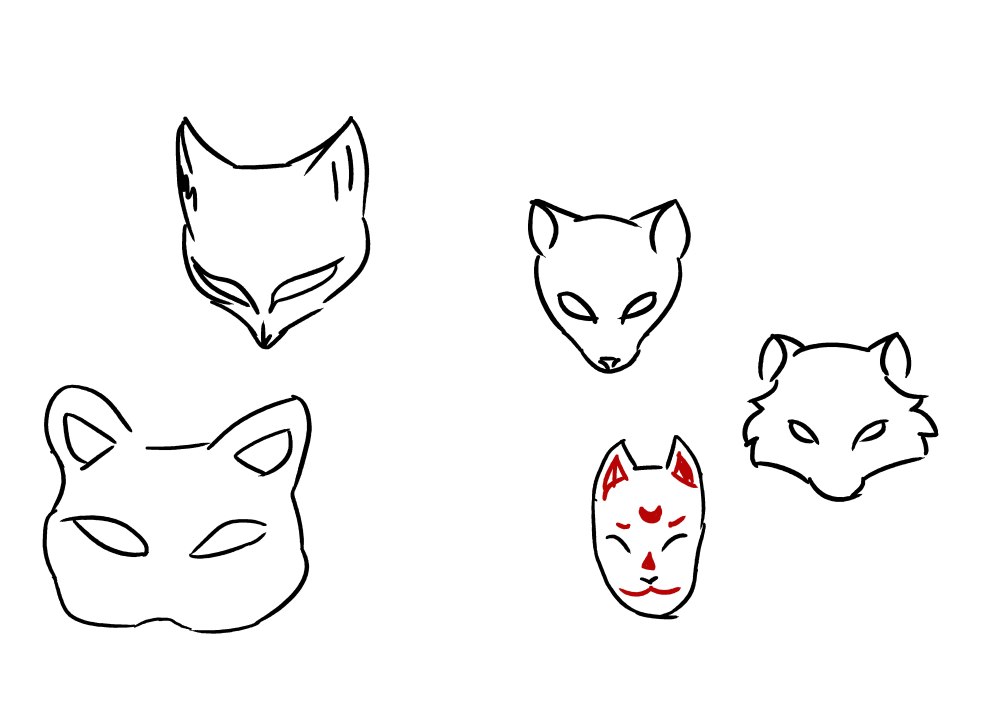
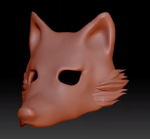
Kitsune Mask Modelling

In order to get the proportions of the mask correct, I began the process by separating the face of the demo head. By modelling the mask according to the head I will know that the mask will be able to fit someone’s head. From here I began sculpting the base of the mask from a sphere and moving the silhouette in the shape of a fox’s head. Once I established the basic shape, I used the standard took to map out the various details I wanted to accentuate on the mask. I then inserted long cylinders and subtracted them to create eye holes. From here I was going to leave it as it is but I wanted to add more detail to the masks. Based on the mask research I found various masks with fur on the side of the mask which resembles the side of a fox’s face. I decided to add to the mask and create an extra layer of fur by extruding the side of the mask out. in order to create stylised fur, I then sculpted creases to resemble the look of stylised fur. Below are images of the process for the Fox mask. Once I completed the modelling I imported it into Autodesk Fusion 360 to adjust the size and export it as a .stl file ready for 3D Printing.


Kitsune Final Mask


Cat Mask Modelling
Similar to the Kitsune mask I also modelled this mask in Zbrush. However, I used the Kitsune mask as the basis to start the modelling and modify it to look like the cat mask I designed. Again, once I finished the modelling I imported the obj into Autodesk Fusion 360 to resize and render out the images of the mask.


Final Cat Mask


Tanuki Mask
Again I used the Kitsune mask as a basis to create the Tanuki mask. This mask looks quite similar to the Kitsune mask because of the shape. However, I created the stylised fur with external shapes rather than carving it stright into the mask itself. In addition to this the mask is a lot flatter compared to the Kitsune mask.


Final Tanuki Mask


Mask Printing
Once I modelled the masks I passed them onto Sam who then printed off the masks. The first mask I printed was the kitsune mask. When I passed the file onto Sam we found that it wouldn’t fit the printer which resulted in two options:
1 – Print the mask in parts which would result in longer printing time, putting the parts together and cost more money.
2 – Resize the mask to a smaller size which means that people wouldn’t be able to wear the masks.
As the animation project isn’t aiming to create a final product but more of a prototype that is close to it I found that option 2 would benefit me more. The smaller mask would still be able to be intractable because it is made of plastic and the most important aspect of this project is the AR rather than the mask itself. In addition to this, I’m also aiming to print more than one mask so keeping the costs low would benefit.
Kitsune / Fox Mask


Once the mask was printed I needed to rinse the mask to remove it from the glass panel it was printed on. As you can see from the images above, in order for the masks to be printed it needed support pillars which keeps the various parts of the mask from collapsing. before printing, we were concerned that parts of the maks would collapse because of the thickness of those parts. However, we found that the mask printed quite well despite this. The supports needed to be ripped and chiselled out and any plastic left could be sanded out.
I found that the masks were left with a ribbed texture on the mask rather than a smooth surface. This meant that I needed to sand down the surface in order to achieve a smooth surface so I can paint the mask in the future. However, when I sanded the mask I found that the intricate areas such as the inner ear and fur were quite difficult to sand because of the shape. I also found that the intricate detailing of the fur was lost because of the sanding. Nonetheless, the mask is a prototype and from the feedback on my peers, the mask still looked like the fox creature I wanted to achieve. As this workflow worked I then printed the remaining mask which can be seen below.
Bakaneko / Cat Mask


Tanuki / Racoon Mask


With the racoon mask I found that the fur of the mask didn’t print as well as the fox mask because it was too thin this meant that the tips had broken when I removed the support.


 Once I sanded the masks I found that the ribbed texture was still evident in various areas of the mask. I decided to use XTC-3D which is a coating which can be used on PLA. This coated a thick layer on the mask which smoothed the bumpy texture by seeping into the ridges. Once I coated the masks I needed to leave them to cure for 24 / 42 hours. I then sanded down again to create the smooth surface I needed before I could spray the primer on the masks to even out the colour so that I could paint the masks later. For the painting of masks, I began by drawing out the outline of the design I wanted based on the concept of art I created previously. I then carefully painted it with red and black acrylic paint to achieve the final outcome of the masks.


For prototypes, I am satisfied with the outcome of these masks but for the final masks, I would need to consider various things I found that have gone wrong when creating these masks. Such as possibly printing the intricate areas of the mask deeper so that when I sand it, it wouldn’t disappear. Also, printing intricate details thicker to that it wouldn’t break.
I later will use the markings on the mask as the image base for the AR app which can be seen llater in the blog.
