
Character Modelling
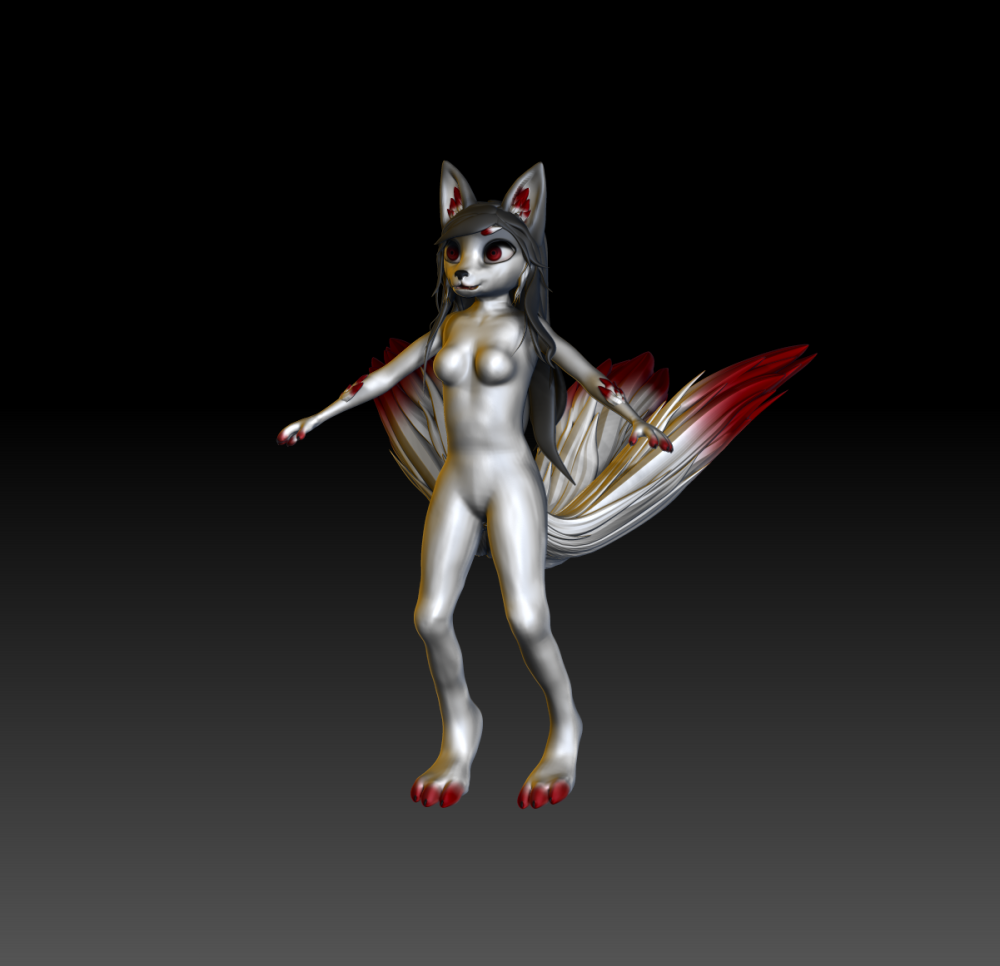
As it is an anthropomorphic character I decided to use the female model in Zbrush as the base of the model and sculpt it according to the concept art I created. I started the process by morphing the model’s limbs to silhouette the fox character I created in my concept art.


In my anthropomorphic research, I found that if I want to include the animal’s features on the human’s body I would need to structure the limbs such as the feet/paw. I decided that I would have the characters paw on its toes rather than the whole paw because this would be more animal-like. I looked at various anthormorphic sketches of limbs to figure out the correct porortions and shape of how the paws/feet will look on the character. In the diagram below, there are skeleton drawins of a dog and human. I used the diagram of the standing dog to aid the sculting of the feet so that the character looks like its naturally standing.


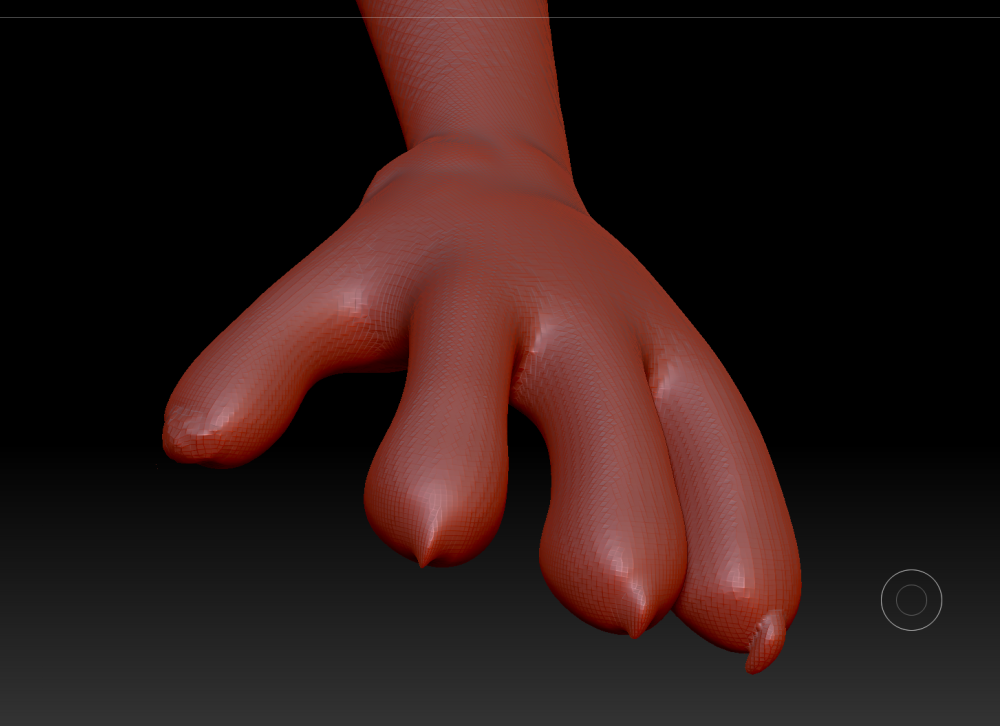
Once I established the basic shape of the feet I proceeded to morph the hands to resemble shorter and more paws. As the feet were quite animal like the hands also needed to resemble the character. I shortened the fingers and used the clay build up tool to add to the structure of the fingertips, to create a more stylised look similar to the characters concept art. I then subdivided the mesh and sculpt the claws on both the hands and feet.


For the head of the character, I smoothed out the head I had previously sculpted and morphed it to an approximate structure of how I want the shape of the head to be. I then Zsubbed the eye sockets from the head to provide an idea of where the eyes will be and how it will look on the skull. I also extruded the nose of the character and adjusted the basic shape of the head to match the one I created within my concept art. Once I was happy with the shape I then went on to sculpt the detail of the nose, mouth and around the eye socket.


For the hair of the Kitsune, I appended spheres and morphed it to produce various layers of hair to resemble thick strands of hair. I originally designed the hair to be brushed back rather than have a fringe. I decided to add this design decision because I would be able to hide the seams of the ears under the hair. In addition to this, the fringe will frame the face, accentuating and bringing more attention to the face. I also think that the hairstyle is more human balancing the animalistic characteristics the model has.


When I initially made this character I forgot about making the tail. As both the characters have tails I decided to create a tail that can be used for both characters. To make the modelling of stylised fur easier I decided to outsource fur tools. I used the IMM FUR (Sousa, 2018) to help create the tail. I started off with a cylinder and morphed it into the shape I wanted the tail to be. Once I was satisfied with the basic shape I used the IMM Fur ( Sousa, 2018) tools to append various fur shapes onto of the tail base. I then used the transpose tool to taper and bend each piece to make it look more stylised.


For the Kitsune I designed the character to have three tails. To achieve this I duplicated the tail twice and arranged it on the lower portion of the character. I then stretched out the tail to make it longer which resulted in the fur to stretch fitting the characters long hair stands.
")
")
")
Texturing
Before texturing, I needed to UV unwrap the different subtools to be able to import it into Substance Painter. However, since I had never UV unwrapped before I wasn’t aware that unwrapping a high poly model would be so difficult. When I used the UV unwrap tool in ZBrush on the high poly my computer would lag because of the lack of memory. Once I managed to get the flattened UV and imported it into substance painter, the program would automatically shut down because of the size of the file.

To work around this I duplicated the model and Zremeshed it to produce a low poly version of the subtool. I then divided the took to 4/5 divisions and projected the original subtool onto the new version. Before I UV unwrap the new subtool I wanted to choose where the seams of the unwrap would be. By doing this, when I later texture the model the seam will not be visible. I. used the control painting tool within Zbrush and painted the face of the model which resulted in the toll to unwrap a seam on the back of the models head rather than the front. If the seam was in the front of the models head it will later result in a line where the seam is when texturing the model later in the pipeline.


Once I UV unwrapped the low poly model I copied the UV onto the high poly model and exported both the high poly and low poly subtools with the new UV. In substance painter, I imported the low poly model as the base to texture on. However, using this method meant that the texture would be in low resolution because of the low poly count on the UV. In substance painter, there is an option to “use low poly mesh as high poly mesh”. Which is a setting that allows me to texture the high poly model on the low poly version. Now that I’ve fixed the UV problem I proceeded to paint the texture on the model using the concept art I had previously created.


When I finished the texturing for the model and applied the texture onto the Brush subtotal I found that the texture didn’t fit the model at all. The texture map seemed to be flipped when exported from subtense painter. I managed to fix this by using photoshop to flip the texture map. However, I found that the texture was still at a low resolution and texturing on the high. poly projection in substance painter didn’t work. To combat this, I decided to poly paint in ZBrush as it seemed to be an easier way to texture the various subtotals and be able to see them merged all together.

")
")
")


Clothing
For the Kimono I decided to use Marvelous Designer to create it, I imported the low poly version of the body and aligned the target points on the body. This will later help me when I need to place the cuts of fabric on specific areas of the body. Before I started creating the kimono I decided tot best the program by creating a basic vest. This really help me familiarise myself with the programme as I have never used it before.


Once I was confident with the tools I began creating a kimono by looking at the concept art I create. However, as I know nothing about clothing and how to make it I found it very difficult to create a kimono from scratch. When draping the clothing on the model the cloth would scrunch awkwardly. I found stitching the different fabrics quite difficult because of the ordination of the different sides. I deiced to look online and find various kimono patterns and experiment with them until I found one I liked.


In the example above, I found that there was too many pieces of material and it made a simple kimono complicated. The shape of the kimono also didn’t sit on the model well and I couldn’t seem to get the collar of the kimono to sit straight on the character.


I decided to follow this pattern provided on the marvellous designer forum by vintronix (Kimono, 2017). I like how simple the kimono is and thought that it would be a lot easier to adjust once I’ve made the base of the kimono. I created the pieces by tracing over the pattern and stitching the seams where I deemed appropriate. In order to keep the clothing on the model when the simulation is running, I had to pin the cloth onto the model, which is how I kept the front of the kimono folded. When the base was complete I adjusted the colour of the fabric to the colours I had previously chosen in the clothing research.


